ダイアログ
ダイアログウィンドウ、またはダイアログは今日のGUIアプリケーションには不可欠です。 ダイアログとは2人以上の会話だと定義されています。 コンピュータアプリケーションでは、ダイアログとはアプリケーションと「対話」するためのウィンドウです。 ダイアログは、データを入力したりアプリケーションの設定を変更したりするのに使われます。 ダイアログはユーザとコンピュータプログラムがコミュニケーションするための重要な手段なのです。
DONE シンプルなメッセージボックス
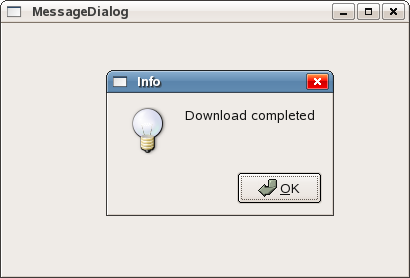
メッセージボックスは短い情報をユーザに提供します。 CDを焼くアプリが良い例です。CDを焼き終えたら、メッセージボックスが表示されます。
#! /usr/bin/env python

# message.py

import wx

class MessageDialog(wx.Frame):
    def __init__(self, parent, id, title):
        wx.Frame.__init__(self, parent, id, title)

        wx.FutureCall(5000, self.ShowMessage)

        self.Centre()
        self.Show(True)

    def ShowMessage(self):
        wx.MessageBox('Download completed', 'Info')

app = wx.App()
MessageDialog(None, -1, 'message.py')
app.MainLoop()
wx.FutureCall(5000, self.ShowMessage)
wx.FutureCallはメソッドを5秒後に呼び出します。 1番目のパラメータは、与えられたメソッドが呼び出されるまでの時間です。 パラメータはミリ秒です。 2番目のパラメータは、呼び出されるメソッドです。
def ShowMessage(self):
    wx.MessageBox('Download completed', 'Info')
wx.MessageBoxは小さなダイアログウィンドウを表示します。 私たちは3つのパラメーターを渡します。 テキストメッセージとタイトルメッセージと、ボタンです。
DONE 定義済みダイアログ
wxPythonには、いくつかの定義済みダイアログがあります。 これらはテキストを表示したり、入力を受け取ったり、ファイルを読み書きしたりといった、 共通したプログラミングタスク用のダイアログです。
DONE メッセージダイアログ
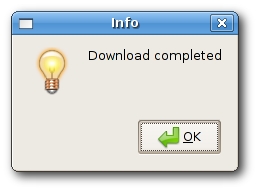
メッセージダイアログはユーザへのメッセージを表示するのに使われます。 これらは先ほどの例で出てきたシンプルなメッセージボックスより、もっと使い勝手がいいです。 これらはカスタマイズ可能です。 ダイアログに表示されるアイコンやボタンは変更できます。
| フラグ | 意味 |
|---|---|
| wx.OK | Ok ボタンを表示 |
| wx.CANCEL | Cancel ボタンを表示 |
| wx.YES_NO | Yes, No ボタンを表示 |
| wx.YES_DEFAULT | Yes ボタンをチェック済みにする |
| wx.NO_DEFAULT | No ボタンをチェック済みにする |
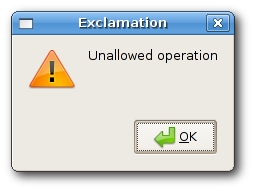
| wx.ICON_EXCLAMATION | アラートアイコンを表示する |
| wx.ICON_ERROR | エラーアイコンを表示する |
| wx.ICON_HAND | wx.ICON_ERROR と同じ |
| wx.ICON_INFORMATION | info アイコンを表示する |
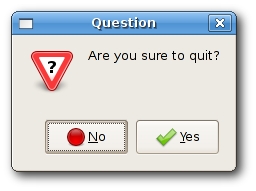
| wx.ICON_QUESTION | question アイコンを表示する |
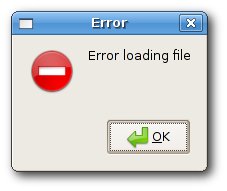
#! /usr/bin/env python

# messages.py

import wx

class Messages(wx.Frame):
    def __init__(self, parent, id, title):
        wx.Frame.__init__(self, parent, id, title, size=(250, 150))

        panel = wx.Panel(self, -1)

        hbox = wx.BoxSizer()
        sizer = wx.GridSizer(2, 2, 2, 2)

        btn1 = wx.Button(panel, -1, 'Info')
        btn2 = wx.Button(panel, -1, 'Error')
        btn3 = wx.Button(panel, -1, 'Question')
        btn4 = wx.Button(panel, -1, 'Alert')

        sizer.AddMany([btn1, btn2, btn3, btn4])

        hbox.Add(sizer, 0, wx.ALL, 15)
        panel.SetSizer(hbox)

        btn1.Bind(wx.EVT_BUTTON, self.ShowMessage1)
        btn2.Bind(wx.EVT_BUTTON, self.ShowMessage2)
        btn3.Bind(wx.EVT_BUTTON, self.ShowMessage3)
        btn4.Bind(wx.EVT_BUTTON, self.ShowMessage4)

        self.Centre()
        self.Show(True)

    def ShowMessage1(self, event):
        dial = wx.MessageDialog(None, 'Download completed', 'Info', wx.OK)
        dial.ShowModal()

    def ShowMessage2(self, event):
        dial = wx.MessageDialog(None, 'Error loading file', 'Error',
                                wx.OK | wx.ICON_ERROR)
        dial.ShowModal()

    def ShowMessage3(self, event):
        dial = wx.MessageDialog(None, 'Are you sure to quit?', 'Question',
                                wx.YES_NO | wx.NO_DEFAULT | wx.ICON_QUESTION)
        ret = dial.ShowModal()

    def ShowMessage4(self, event):
        dial = wx.MessageDialog(None, 'Unallowed operation', 'Exclamation',
                                wx.OK | wx.ICON_EXCLAMATION)
        dial.ShowModal()

app = wx.App()
Messages(None, -1, 'messages.py')
app.MainLoop()
例では4つのボタンを作って、それらを wx.GridSizer に入れました。 これらのボタンは4つの異なったダイアログウィンドウを表示します。 異なるスタイルのフラグを設定することで、これらのウィンドウを作ります。
dial = wx.MessageDialog(None, 'Error loading file', 'Error', wx.OK | wx.ICON_ERROR)
dial.ShowModal()
メッセージダイアログの作り方は簡単です。 親ウィンドウにNoneを指定することで、ダイアログをトップレベルのウィンドウに設定できます。 2つの文字列は、それぞれメッセージ本文とダイアログのタイトルになります。 wx.OK と wx.ICON_ERROR フラグでOkボタンとエラーアイコンを表示します。 ダイアログをスクリーンに表示するために、 Show Modal() メソッドを呼び出します。
DONE アバウトダイアログボックス
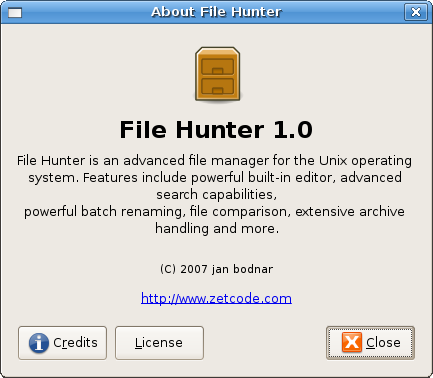
ほとんどのアプリケーションは、典型的なaboutダイアログボックスを持っています。 これは普通ヘルプメニューにあります。 このダイアログの目的は、ユーザにアプリケーションの名前とバージョンについて基本的な情報を提供することにあります。 昔は、これらのダイアログは極めて簡潔でした。 最近は、これらのボックスは作者についての追加情報を提供しています。 追加のプログラマやドキュメントを書いた人のクレジットも表示します。 アプリケーションのライセンスも提供します。企業のロゴやアプリケーションのロゴも表示します。 有能なaboutボックスはアニメーションも表示します。 wxPythonは2.8.xシリーズからは特別なaboutボックスを持っています。 こうしたダイアログを手動で作るのは難しくありません。 これによってプログラマはより快適になるでしょう。
ダイアログボックスはMiscモジュールにあります。 aboutダイアログボックスをつくるには、2つのオブジェクトをつくる必要があります。 wx.AboutDialogInfo と wx.AboutBox です。
wx.AboutDialogInfo()
以下のメソッドを wx.AboutDialogInfo オブジェクト上で呼び出すことができます。 これらのメソッドは名前見たらだいたい何するかわかります。
| メソッド | 説明 |
|---|---|
| SetName(string name) | プログラムの名前を設定します |
| SetVersion(string version) | プログラムのバージョンを設定します |
| SetDescription(string desc) | プログラムの説明を設定します |
| SetCopyright(string copyright) | プログラムのコピーライトを設定します |
| SetLicence(string licence) | プログラムのライセンスを設定します |
| SetIcon(wx.Icon icon) | 表示するアイコンを設定します |
| SetWebSite(string URL) | プログラムのwebサイトを設定します |
| AddDeveloper(string developer) | 開発者を開発者リストに追加します |
| AddDocWriter(string docwriter) | ドキュメント記述者をドキュメント記述者リストに追加します |
| AddArtist(string artist) | アーティストをアーティストリストに追加します |
| AddTranslator(string developer) | 翻訳者を翻訳者リストに追加します |
wx.AboutBox のコンストラクタは以下のとおり。 wx.AboutDialogInfo を引数にとります。
wx.AboutBox(wx.AboutDialogInfo info)
wxPythonは2種類のaboutボックスを表示できます。 どのボックスを使うかは、使用するプラットフォームと呼び出すメソッドによります。 ネイティブのダイアログかwxPythonの汎用ダイアログになります。 WindowsネイティブのダイアログボックスはカスタムアイコンとライセンスとURLが表示できません。 これら3つのフィールドを外せば、wxPythonはネイティブのダイアログを表示します。 そうでなければ、汎用ダイアログを使用します。 もし可能な限りネイティブの環境を使用したければ、ライセンスの情報は分けてメニューのアイテムとして提供する方がいいでしょう。 GTK+はすべてのフィールドを表示できます。
#! /usr/bin/env python

# aboutbox.py

import wx

ID_ABOUT = 1

class AboutDialogBox(wx.Frame):
    def __init__(self, parent, id, title):
        wx.Frame.__init__(self, parent, id, title, size=(260, 200))

        menubar = wx.MenuBar()
        help = wx.Menu()
        help.Append(ID_ABOUT, '&About')
        self.Bind(wx.EVT_MENU, self.OnAboutBox, id=ID_ABOUT)
        menubar.Append(help, '&Help')
        self.SetMenuBar(menubar)

        self.Centre()
        self.Show(True)

    def OnAboutBox(self, event):
        description = """File Hunter is an advanced file manager for the Unix operating
system. Features include powerful built-in editor, advanced search capabilities,
powerful batch renaming, file comparison, extensive archive handling and more.
"""

        licence = """File Hunter is free software; you can redistribute it and/or modify it
under the terms of the GNU General Public License as published by the Free Software Foundation;
either version 2 of the License, or (at your option) any later version.

File Hunter is distributed in the hope that it will be useful, but WITHOUT ANY WARRANTY;
without even the implied warranty of MERCHANTABILITY or FITNESS FOR A PARTICULAR PURPOSE.
See the GNU General Public License for more details. You should have received a copy of
the GNU General Public License along with File Hunter; if not, write to
the Free Software Foundation, Inc., 59 Temple Place, Suite 330, Boston, MA  02111-1307  USA"""

        info = wx.AboutDialogInfo()

        info.SetIcon(wx.Icon('./icons/hunter.png', wx.BITMAP_TYPE_PNG))
        info.SetName('File Hunter')
        info.SetVersion('1.0')
        info.SetDescription(description)
        info.SetCopyright('(C) 2007 jan bodnar')
        info.SetWebSite('http://www.zetcode.com')
        info.SetLicence(licence)
        info.AddDeveloper('jan bodnar')
        info.AddDocWriter('jan bodnar')
        info.AddArtist('The Tango crew')
        info.AddTranslator('jan bodnar')

        wx.AboutBox(info)

app = wx.App()
AboutDialogBox(None, -1, 'aboutbox.py')
app.MainLoop()
        description = """File Hunter is an advanced file manager for the Unix operating
system. Features include powerful built-in editor, advanced search capabilities,
powerful batch renaming, file comparison, extensive archive handling and more.
"""
It is not the best idea to put too much text into the code of the application. I don't want to make the example too complex, so I put all the text into the code. But in real world programs, the text should be placed separately inside a file. It helps us with the maintenace of our application. For example, if we want to translate our application to other languages.
アプリケーションのソースコードに大量のテキストを埋め込むのは、あまり良い方法ではありません。 サンプルを複雑にしたくないので、あえてこのようにしてあります。 しかし実際のプログラミングでは、テキストは別のファイルに分割されるべきです。 そのほうがアプリケーションの保守をしやすくなります。 たとえば、他の言語にアプリケーションを翻訳したい時に、テキストが別のファイルに分けてあったほうが便利です。
info = wx.AboutDialogInfo()
The first thing to do is to create a wx.AboutDialogInfo object. The constructor is empty. It does not taky any parameters.
まず最初にすべきことは、 wx.AboutDialogInfo オブジェクトを作ることです。 コンストラクタに引数を設定する必要はありません。
info.SetIcon(wx.Icon('icons/hunter.png', wx.BITMAP_TYPE_PNG))
info.SetName('File Hunter')
info.SetVersion('1.0')
info.SetDescription(description)
info.SetCopyright('(C) 2007 jan bodnar')
info.SetWebSite('http://www.zetcode.com')
info.SetLicence(licence)
info.AddDeveloper('jan bodnar')
info.AddDocWriter('jan bodnar')
info.AddArtist('The Tango crew')
info.AddTranslator('jan bodnar')
The next thing to do is to call all necessary methods upon the created wx.AboutDialogInfo object.
次にやることは、 作成された wx.AboutDialogInfo オブジェクトから必要なメソッド全てを呼び出すことです。
wx.AboutBox(info)
In the end we create a wx.AboutBox widget. The only parameter it takes is the wx.AboutDialogInfo object.
最後に、 wx.AboutBox ウィジェットを作ります。 引数は wx.AboutDialogInfo オブジェクトだけです。
And of course, if we want to have an animation or some other eye candy, we must implement our about dialog manually.
そしてもちろん、アニメーションやその他の見た目に素敵なものを追加したければ、手動でダイアログを実装する必要があります。
DONE カスタムダイアログ
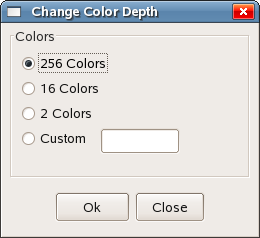
次の例ではカスタムダイアログを作ります。 画像編集アプリケーションは画像の色深度を変更することが出来ます。 この機能を提供するのに適したダイアログを作成しましょう。
#!/usr/bin/python

import wx

ID_DEPTH = 1

class ChangeDepth(wx.Dialog):
    def __init__(self, parent, id, title):
        wx.Dialog.__init__(self, parent, id, title, size=(250, 210))

        panel = wx.Panel(self, -1)
        vbox  = wx.BoxSizer(wx.VERTICAL)

        wx.StaticBox(panel, -1, 'Colors', (5, 5), (240, 150))
        wx.RadioButton(panel, -1, '256 Colors', (15, 30), style=wx.RB_GROUP)
        wx.RadioButton(panel, -1, '16 Colors', (15, 55))
        wx.RadioButton(panel, -1, '2 Colors', (15, 80))
        wx.RadioButton(panel, -1, 'Custom', (15, 105))
        wx.TextCtrl(panel, -1, '', (95, 105))

        hbox     = wx.BoxSizer(wx.HORIZONTAL)
        okButton = wx.Button(self, -1, 'Ok', size=(70, 30))
        closeButton = wx.Button(self, -1, 'Close', size=(70, 30))
        hbox.Add(okButton, 1)
        hbox.Add(closeButton, 1, wx.LEFT, 5)

        vbox.Add(panel)
        vbox.Add(hbox, 1, wx.ALIGN_CENTER | wx.TOP | wx.BOTTOM, 10)

        self.SetSizer(vbox)

class ColorDepth(wx.Frame):
    def __init__(self, parent, id, title):
        wx.Frame.__init__(self, parent, id, title, size=(350, 220))

        toolbar = self.CreateToolBar()
        toolbar.AddLabelTool(ID_DEPTH, '', wx.Bitmap('icons/color.png'))

        self.Bind(wx.EVT_TOOL, self.OnChangeDepth, id=ID_DEPTH)

        self.Centre()
        self.Show(True)

    def OnChangeDepth(self, event):
        chgdep = ChangeDepth(None, -1, 'Change Color Depth')
        chgdep.ShowModal()
        chgdep.Destroy()

app = wx.App()
ColorDepth(None, -1, '')
app.MainLoop()
class ChangeDepth(wx.Dialog):
    def __init__(self, parent, id, title):
        wx.Dialog.__init__(self, parent, id, title, size=(250, 210))
サンプルコードでは wx.Dialog ウィジェットを継承して、カスタム色深度変更ダイアログを作ります。
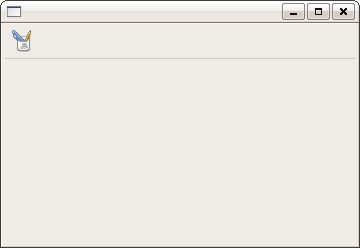
chgdep = ChangeDepth(None, -1, 'Change Color Depth')
chgdep.ShowModal()
chgdep.Destroy()
ChangeDepthクラスをインスタンス化します。 次に ShowModal() ダイアログを呼び出します。 ダイアログは Destroy() で、忘れず破棄します。 ダイアログとトップレベルウィンドウの見た目の違いに注目してください。 ダイアログが破棄されるまで、トップレベルウィンドウでは作業できません。 ウィンドウのタイトルバーに違いがはっきりと出ています。
Date: 2010-11-18 17:03:05 UTC
HTML generated by org-mode 7.3 in emacs 23